How to Turn a Photo Into a Coloring Page
Turn photos into simple caricatures
Sometimes it's good to simply have fun with Photoshop, and we're going to do just that by turning a portrait into an amusing caricature. Making these cartoon-like photos is a great way to get creative, and you can use the images however you like.
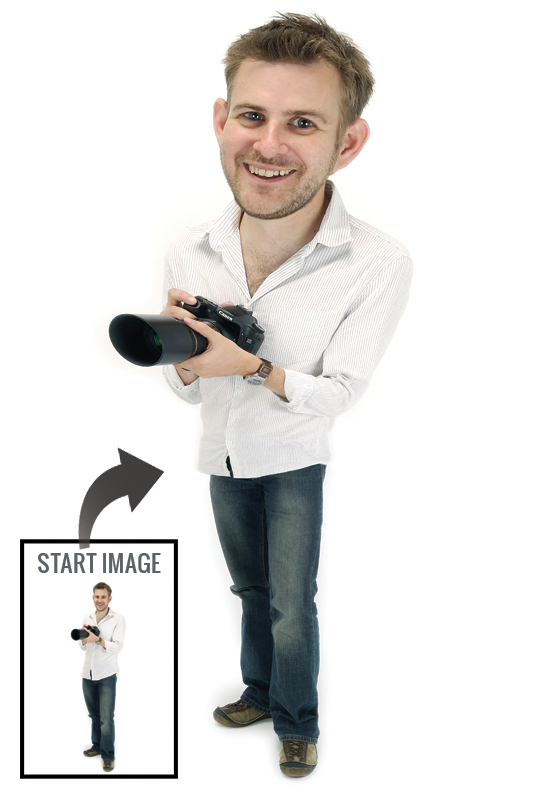
Our start image, caricature_start.jpg, is a full-length studio portrait taken against a clean white background. A plain background like this makes it easier to cut up, resize and skew parts of the image to make the final caricature. When applying these techniques to your own photos, you might first want to use the Lasso tool to select your subject, then Copy (Ctrl+C) and Paste (Ctrl+V) it into a new layer. To make the background white, simply click on the Background layer's visibility (eye) icon to turn it off, then go to Layer>FlattenImage and save it as a JPEG. Now you're ready to get started.
Read on to find out how to get the caricature effect with Photoshop Elements 5.0 (you can also use all versions of of CS up to and including Photoshop CS6).
Click here to download start image
01. Off with his head
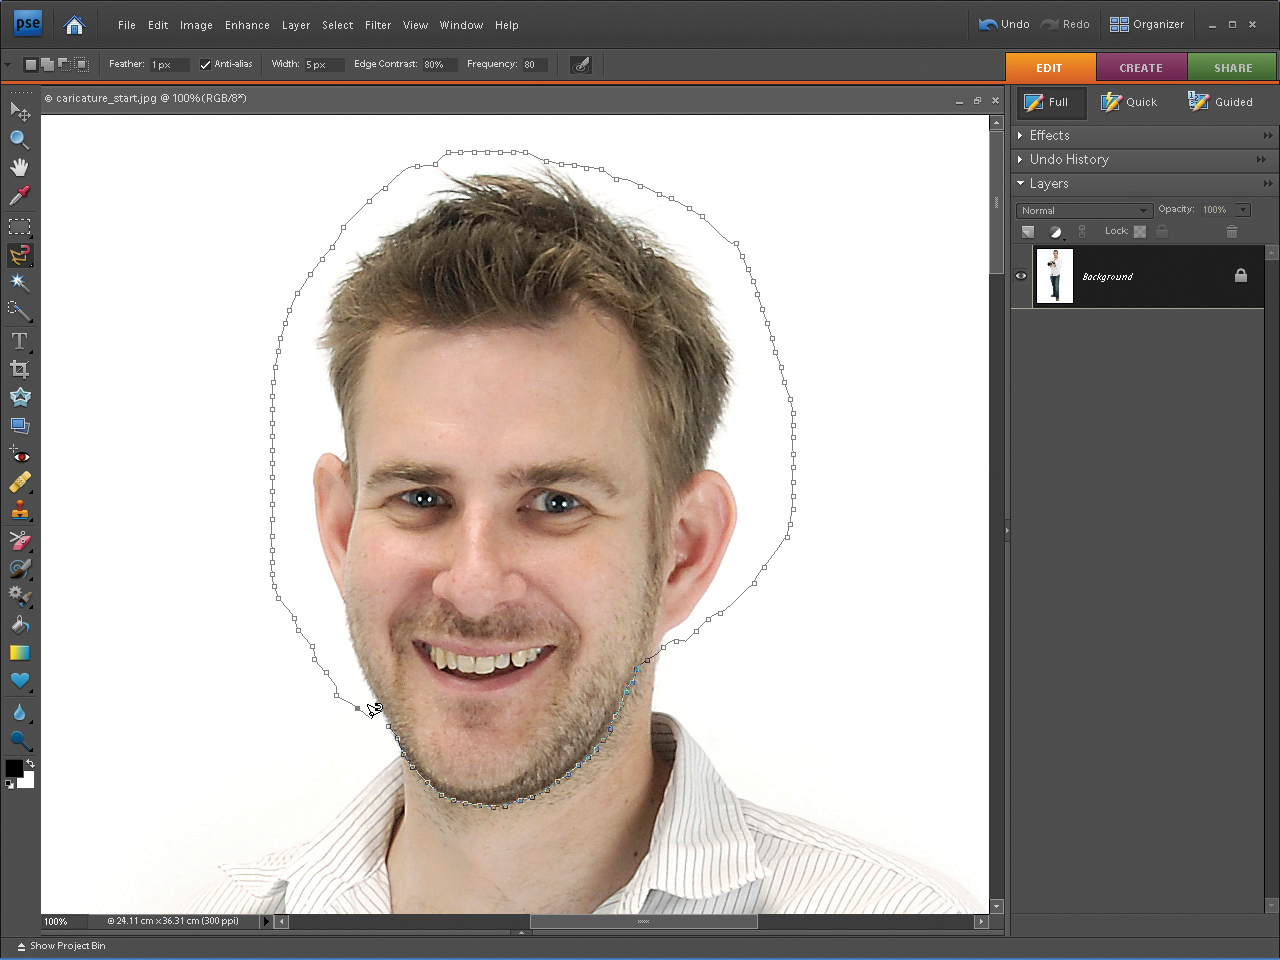
Open caricature_start.jpg. Go to Layer>New>Layer
FromBackground to make a new layer, then name it 'Body'. Zoom in to 100% and select the Magnetic Lasso tool from the Tools palette. Set Feather to 1 pixel, Width to 1 pixel and Edge Contrast and Frequency to 80. Carefully cut around the jaw line, and more roughly around the head.
02. Enlarge at will
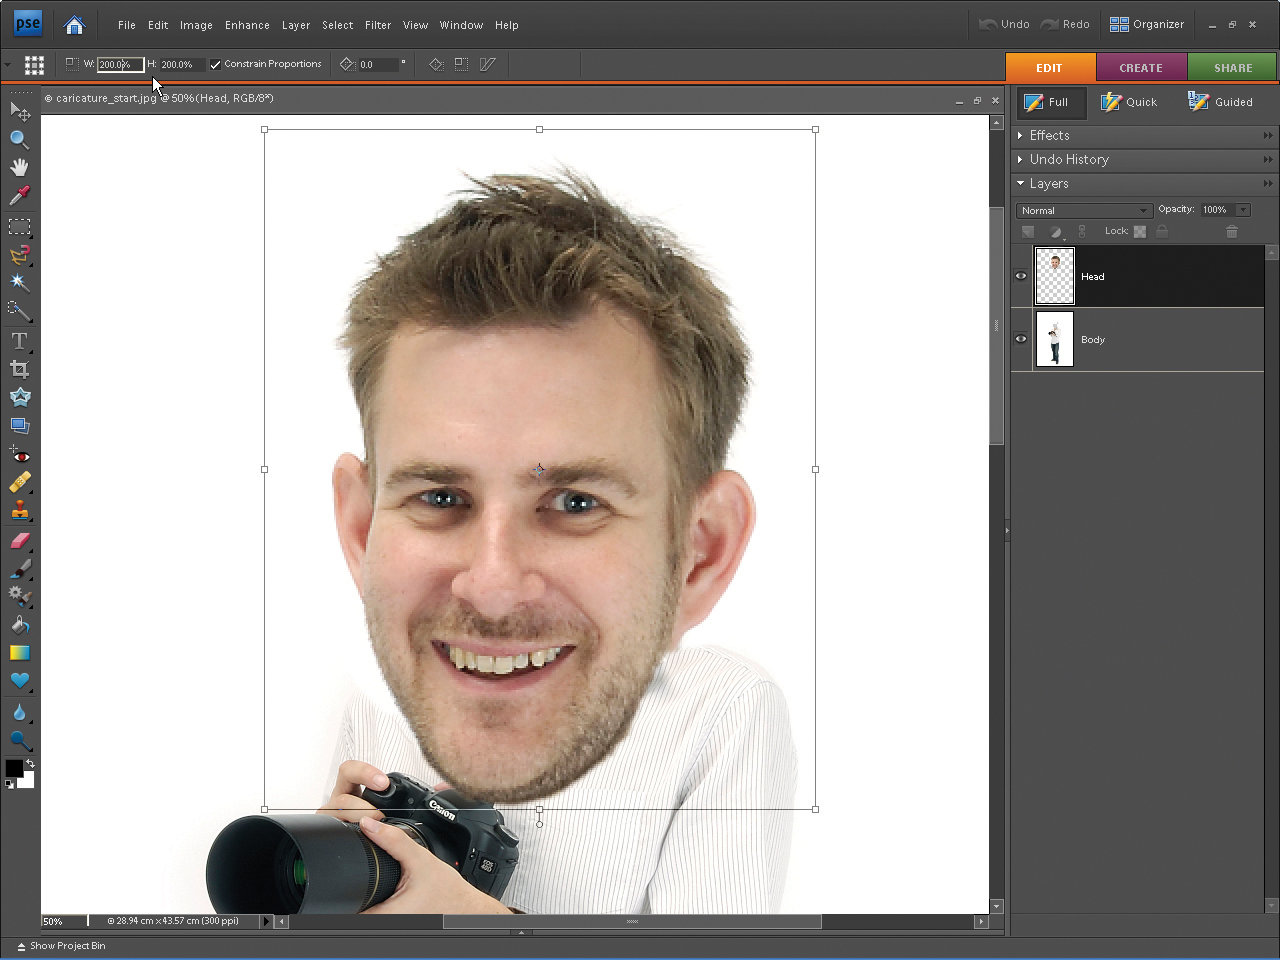
Go to Edit>Cut to cut off the head and then click on the Create New Layer icon in the Layers palette. Double-click on the new layer to rename it 'Head' and then go to Edit>Paste to paste the head into this new layer. Zoom back out to 50% and go to Image>Transform>FreeTransform. Now tick the Constrain Proportions box and type 200% into the Width box to make the head bigger!
03. Take off the shirt!

Type 7° in the Rotate box and click in the box around the head to drag it upwards. When you're happy with the head's position, click the tick. Zoom out to see the bottom of the shirt, then select the 'Body' layer. As in step 1, select the Magnetic Lasso tool and cut out the shirt and upper body. Don't worry about the head as it's on a different layer.
04. Get superhero shoulders

Repeat step 2, this time cutting out the shirt and pasting it into a new layer called 'Shirt'. Zoom out to 25% and then go to Image>
Transform>Distort. Click in the box to move the shirt back down to the waistline, then click on the top corners to drag them upwards and out to the side. Click the tick when you're happy with the effect.
05. Broaden the appeal

If you need to reposition the head, select the 'Head' layer in the Layers palette, grab the Move tool from the Tools palette and then click anywhere in the box that appears to drag the head back into position. If you want to make the head slightly bigger at this stage, go back to Image>Transform>FreeTransform, untick Constrain Proportions and drag out the sides of the box to make it look wider. Click the tick.
06. It's all in the eyes

Now go to Filter>Distort>Liquify. Zoom in to 100% and select the Bloat tool from the left-hand toolbar. Set the Brush Size to 30 and Brush Pressure to 50 and click a few times over each eye to exaggerate them. Click OK when you're happy with the effect, then use the Zoom tool to fit to screen. Go to Layer>FlattenImage to ensure a white background.
This tutorial first appeared in Portrait Photography Made Easy - a bookazine from the makers of PhotoPlus.
Now read:
- 30 free Photoshop brushes every creative must have!
- 101 Photoshop tutorials
- 20 best Photoshop plugins
Related articles
How to Turn a Photo Into a Coloring Page
Source: https://www.creativebloq.com/photoshop/turn-portraits-caricatures-11121245